Solving Wet Basements in London, Ontario with Weeping Tile Upgrades
Basement dampness is common in London, Ontario, and not only in century homes. The city’s mix of clayey soils, frequent freeze and thaw cycles, and big spring rains puts steady pressure on foundations across Old East Village, Old South, Wortley, and the newer subdivisions north and west of the river. When groundwater swells and sits, or eavestroughs dump water too close to footings, it only takes a few missed details for moisture to find its way inside. A wet basement contractors london functional weeping tile system is the backbone of a dry basement here. When it is clogged, undersized, or simply missing, the first symptom is usually a musty corner or a faint white bloom of efflorescence. If left to escalate, that damp mark can become a seasonal flood.
This guide walks through how modern weeping tile upgrades solve the problem in London’s conditions, how they tie into broader yard drainage, what a sound installation looks like, and how to choose the right approach and contractor without throwing money at the wrong fix.
Why London’s basements get wet
London sits on a mix of glacial till and clay-rich soils that hold water rather than let it percolate quickly. After a long rain or rapid snowmelt, you can dig a small hole in some backyards and see it fill with water within hours. This soil behavior means hydrostatic pressure builds against foundation walls, especially in houses where grading has flattened over time and downspouts discharge near the foundation. The Thames River corridor also influences the local water table, so homes even a few blocks off the river can see seasonal spikes.
Age matters. Homes built before the mid 1960s often used clay or concrete weeping tiles. Those rigid sections relied on closely spaced joints to admit water. Over decades, fine clay sediments and mineral deposits like iron ochre can clog those joints. Even many 1970s and 1980s homes that used early perforated plastic pipe don’t meet today’s standards for filter fabric or stone bedding, so silt infiltration still happens. Meanwhile, basement renovations that added drywall and insulation can hide trouble that used to be obvious, turning a slow leak into mold behind the wall.
Finally, weather patterns are changing. In the last decade, London has seen more frequent cloudbursts that dump a month’s worth of rain in a weekend. Systems that handled the average day 30 years ago now get overwhelmed. Upgrades are not simply about patching a crack. They are about increasing the entire system’s capacity to direct water away from the foundation.
How a weeping tile system is supposed to work
A weeping tile is a perforated drain at the foot of your foundation, set below the basement slab and pitched to move groundwater away. Despite the name, modern systems use 4 inch perforated high density polyethylene or PVC pipe, not clay tiles. The pipe sits in a trench against the footing and is wrapped in washed stone and filter fabric so soil can’t clog the perforations. Water that would otherwise push against the wall drops through the gravel, enters the pipe, and flows by gravity to a sump pit and pump or to a daylight discharge if the lot allows a natural outlet.
A complete system has more than pipe. The wall itself gets a dampproofing or waterproofing layer, often a rubberized membrane or a dimpled drainage board that creates an air gap so water can drain freely to the footing drain. At grade, proper slope, extended downspouts, and sometimes french drains or catch basins away from the wall work together to keep surface water from even reaching the footing level.
When the system works, your basement sits in a dry pocket. When it doesn’t, you see persistent dampness after rain or thaw, high humidity, or in severe cases, water rising at the floor wall joint where the slab meets the foundation.
Diagnosing the cause before you dig
Not every wet basement needs a full excavation. The first step is to separate surface water issues from subsurface ones. I have walked into basements with ankle deep water where the only fix needed was to redirect three downspouts and regrade the yard. I have also seen bone dry yards where the sump pit ran every 10 minutes after rain, a classic sign that groundwater is pooling at the footings.
Practical checks help. Inspect every downspout while it rains. If you see sheets of water spilling behind the eavestrough, fix the eavestroughs before anything else. Measure grade. The ground should fall away from the foundation at least 6 inches over the first 10 feet. Probe the basement walls at several points with a moisture meter. Efflorescence at mid wall usually points to migrating moisture, not a plumbing leak. Rusty nails in bottom plates and moldy drywall just above the slab point toward slab edge seepage.
If the house has a sump pit, open the lid after a storm and watch the water level. Frequent short cycling, more than four or five times per hour, can indicate that the drain tile is delivering a lot of water and that you might be at the edge of pump capacity or pipe capacity. Red, jelly-like deposits in the pit or on the pump suggest iron bacteria, which is common in southwestern Ontario and can clog older tiles.
On older homes without an accessible sump, look at the weeping tile discharge. Some properties in London still have connections to the sanitary or storm sewer from decades ago. It is worth confirming with the city and your contractor, because many municipalities restrict or prohibit these connections now. Even when legal, tying into a sewer can create backflow risk during heavy rain.
When a weeping tile upgrade makes sense
If patching the obvious surface problems and adding interior dehumidification do not change the picture, and the signs point to groundwater pressure, an upgrade is the logical next move. In practical terms, the decision usually comes down to one of three conditions.
First, you have repeated leaks at the slab edge or through wall cracks during wet periods. Second, there is no weeping tile present, which is still the case for a surprising number of pre war basements in Old East and Old South. Third, your existing weeping tile is clogged beyond practical cleaning. I once scoped a 1950s bungalow near Baseline and Wharncliffe where the clay tile was half silted and had collapsed in several spots. We could not clear it back to an outlet, and the cost to patch the worst run was barely less than doing it right.
There is also a strategic reason to upgrade before finishing a basement. If you plan a rental suite or a family room, addressing foundation drainage first protects the investment. Drywall, flooring, and trim do not like moisture. The drywall bill alone on a 900 square foot basement can rival the cost to waterproof an entire wall from the exterior.
Exterior versus interior systems
You can cut water off on the outside or catch it on the inside. Both approaches have a place.
Exterior excavation and replacement is the gold standard for stopping lateral water pressure and moving it away before it gets inside. The crew digs down to the footing, cleans the wall, repairs cracks, applies a membrane or dampproof coating, and installs new 4 inch perforated pipe in a bed of 3/4 inch clear stone wrapped in geotextile. A dimple board against the wall helps channel water straight to the pipe and protects the membrane during backfill. The new pipe drains to a sump or a legal outlet. This method resets the clock on your foundation drainage and is the most complete fix, particularly for block walls that weep through the core.
Interior systems catch water that has already reached the inside. The crew cuts a trench around the slab perimeter, typically 8 to 12 inches out from the wall, and installs a perforated pipe that drains to a sump pit. They tie it into weep holes drilled through the bottom course of block or let the water run by capillary action through stone. A vapor barrier and new concrete cap the trench. Interior systems are effective, more affordable, and can be installed year round. They do not, however, relieve outside hydrostatic pressure, and they do not protect the exterior wall from ongoing wetting and freeze and thaw.
Choosing between the two depends on access, budget, wall condition, and goals. If you have extensive landscaping you want to preserve or shared driveways that limit excavation access, an interior system might be the practical choice. If you see bowing, crumbling mortar joints, or widespread exterior spalling, exterior work is worth the disruption.
What a proper exterior weeping tile upgrade looks like
Quality matters in the details. Good crews follow a repeatable process and document it with photos so you can see the wall state, the membrane, the stone, and the pipe before it goes back in the ground.
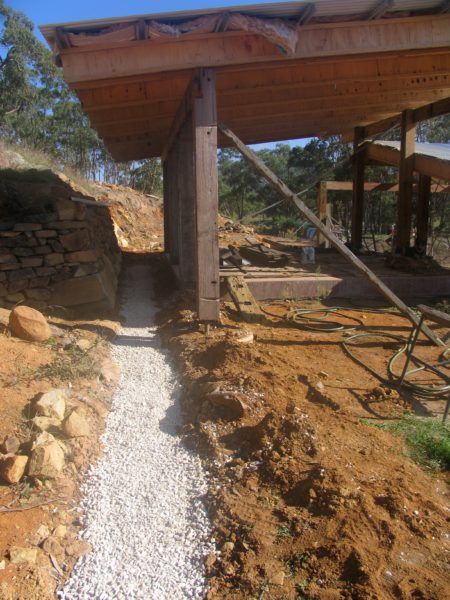
- Mark utilities, excavate, and expose the wall. Ontario One Call locates are a must. Expect excavation to at least the bottom of the footing, usually 6 to 8 feet deep in London basements, sometimes more. Crews should protect walkways and adjacent structures and stockpile soil away from the trench edge.
- Clean, repair, and prep the wall. Scrape off old coatings, brush down, and repair cracks with hydraulic cement or epoxy as appropriate. Parge rough block to make a clean surface for the membrane. Pay attention to the footing wall joint, a common leak path.
- Apply membrane and drainage layer. Many contractors apply a rubberized waterproofing coating and install a dimpled drainage board from grade down to the footing. The dimple board carries water to the drain and guards the membrane during backfill. Flashings and terminations at the top edge keep surface water from getting behind the system.
- Install pipe, stone, and fabric. Place 4 inch perforated pipe on a bed of clean 3/4 inch stone. Maintain positive slope to the sump or outlet, roughly 1 percent if the run allows it. Cover the pipe with more stone, typically 6 to 12 inches above the crown of the pipe, and wrap the stone in geotextile fabric to keep fines out.
- Connect to discharge and backfill carefully. Tie into a sump pit with a solid pipe or to a legal gravity outlet if the lot has natural fall. Backfill in lifts, compacting to reduce future settlement. Restore grading with a positive slope away from the wall and extend downspouts well into the yard.
Expect one side of a typical house to take 3 to 5 working days, weather permitting. Full perimeters often run 1 to 2 weeks. Crews working through rain or freeze risk compromising the membrane bond, so good contractors watch the forecast and do not rush that step.
Tying the system into the sump
The sump pit is often an afterthought, but it is the heart of a tight system when gravity drainage is not possible. A reliable setup includes a basin large enough to avoid short cycling, a primary pump sized to the inflow rate you see in your neighborhood, a check valve to prevent backflow, a discharge line that exits to grade at least several feet from the foundation, and protection against freezing on the outside run. Many homes benefit from a battery backup pump, especially in areas known for power blips during storms.
On costs, a quality primary pump in the 1/3 to 1/2 horsepower range from a reputable brand usually runs 300 to 600 CAD. Installed with a proper pit, discharge, and check valve, expect 1,200 to 2,500 CAD for the full assembly, more if you add a backup system. These are ballpark numbers. Homes with very high inflow or long discharge runs may need larger pumps and larger lines.
Do not discharge into the sanitary sewer. Besides being restricted in many jurisdictions, it is a recipe for basement backups in heavy rain. Discharge to grade on your lot, ideally to a swale that carries water forward to the street or back to a natural low point, and ensure you are not pushing water to your neighbor. The City of London provides guidance on proper discharge locations. A quick call before work begins prevents headaches later.
Surface water control, french drains, and backyard drainage in London, Ontario
Even the best weeping tile can be overwhelmed if the surface throws too much water at the wall. That is where grading, downspouts, and selective use of surface drains come in. In many London yards, the sod has settled and patios sit level with the threshold. Restoring a simple slope away from the house, 1 inch per foot for the first 6 to 8 feet, makes a clear difference. Extensions on downspouts that carry water 8 to 12 feet into the yard do even more. If you prefer discreet solutions, buried downspout lines that daylight to a bubbler can move water without tripping hazards.
French drains are perforated pipes in a gravel trench that intercept and redirect shallow groundwater or stubborn surface flows. They suit areas where a swale would be awkward, such as along a fence line between two tight downtown lots, or across the low edge of a patio where water tends to pool. When clients ask about french drains London Ontario contractors often recommend them to protect a patio edge or to cut off a wet pocket before it reaches the house. The trick is to give the drain a place to go. If your backyard falls toward the house, a french drain alone will not fix that slope. You may need a catch basin and a solid pipe to the front where the grade falls to the street.
Backyard drainage London Ontario projects often combine elements. On one job west of Wonderland Road, a modest regrade behind a walkout, a short french drain to intercept a neighbor’s sump discharge, and a catch basin tied to a solid pipe brought the yard from spongy to firm. The weeping tile no longer saw a surge each time it rained. That kind of integration is a hallmark of thoughtful drainage contractors London Ontario homeowners can trust. They pay attention to the entire water path instead of selling a single product.
The numbers: budget, timing, and disruption
Costs vary with access, depth, and scope, but certain ranges hold up across the city.
- Exterior weeping tile replacement and waterproofing commonly runs 150 to 250 CAD per linear foot in London for typical depths and access. Tight side yards, deep footings, or extensive concrete removal can push that higher.
- Interior perimeter drains generally range from 70 to 140 CAD per linear foot, depending on slab thickness, presence of interior partitions, and whether a new sump is required.
- Wall crack injections as spot repairs often cost 400 to 900 CAD per crack, effective for isolated leaks but not a substitute for a full system where pressure is high.
- Site restoration can add meaningful cost. Replacing a concrete walkway or a deck section may match or exceed the waterproofing line item on that side.
Timelines hinge on weather. Excavation in late fall is possible, but you do not want to apply waterproof membranes on a soaked or frozen wall. Spring and early summer are busy seasons for good contractors, so book ahead if you can. Interior systems can be done anytime, but you will be jackhammering and producing dust, so plan around family schedules.
Disruption is real. Excavators need space. Soil piles sit on tarps on lawns. Foundation plantings usually do not survive. A reputable contractor will be honest about what can be saved and what cannot, and will include basic restoration, grading, and seed or sod in the scope.
Materials and details that separate solid work from shortcuts
Several details make or break performance over the long run.
- Washed stone, not sand or native soil, should surround the pipe. Look for clear 3/4 inch stone and ask to see a delivery ticket if you want to be sure.
- Filter fabric should wrap the stone envelope, not just sit on top. This keeps fines out over time without choking the system.
- Pipe orientation and slope matter. Slots or perforations facing down within a clean stone bed is standard in many modern installations. More important than hole orientation is consistent slope to the outlet and avoidance of sags that trap silt.
- Membrane coverage from grade to below the footing is better than a partial coat. If you are paying for exterior work, protect the wall fully.
- Discharge location should comply with municipal guidance and be set up to avoid ice blockages. A gentle rise where the line exits the house can trap air and cause winter freeze ups. Insulated sections and proper grading prevent that surprise.
When a crew is done, ask for photos. Good contractors take them as they go. You should see a clean wall, repaired cracks, membrane and dimple board, stone and fabric around the pipe, and proper terminations. Those photos are not just proof of work. They are a reference if you sell the house.
Iron ochre and other London specific quirks
Iron bacteria is common across parts of southwestern Ontario. It leaves a rust colored slime that can gum up perforations and pumps. If your sump or old tile shows these signs, tell your contractor early. Design choices follow. Larger basins, accessible cleanouts, and fabric choices that resist biofouling help. In some cases, flushing ports are worth adding. You cannot eliminate the bacteria, but you can build a system that tolerates it and can be serviced. Regular sump maintenance, every 6 to 12 months, matters more in these homes.
Another quirk is mixed foundation types. Many London homes have additions or garage conversions. One wall might be poured concrete, another concrete block, and a third shallow crawlspace. Each requires slightly different detailing. Block walls benefit from weep holes and interior drainage if you go that route, while poured walls respond better to crack injection if the rest of the system is sound. Crawlspaces may need vapor barriers and insulation upgrades in addition to perimeter drains to stop musty odors from drifting into the main house.
Vetting drainage contractors in London, Ontario
Choosing the right team matters as much as the chosen method. You want someone who understands the neighborhood soils, has the equipment to work cleanly in tight lots, and will not guess at discharge rules. Price alone is a poor filter. Use a short, focused checklist to differentiate pros from pretenders.
- Ask for recent, local references with similar houses and scopes. A crew that did a great job on a rural walkout may not be ideal for a narrow Old South lot.
- Request a written scope that specifies pipe type, stone, fabric, membrane, dimple board, discharge details, and restoration. Vague proposals usually hide shortcuts.
- Confirm utility locates, permits if required, and City of London discharge compliance. A contractor who shrugs off these items is a risk to you, not just to them.
- Discuss warranty terms in plain language. Ten to twenty five years on workmanship for exterior systems is common. Ask what is excluded and how service calls are handled.
- Clarify daily site management. How will soil be stored, how will dust be controlled inside, what hours will they work, and who is on site supervising?
The conversation should feel like collaborative problem solving, not a pitch. If a contractor pushes a single solution without inspecting outside and inside, or dismisses your questions about yard drainage, keep looking.
Integrating backyard drainage with the foundation fix
I often tell clients that a weeping tile upgrade is half the job. The other half is keeping as much water as possible from ever reaching it. That can mean subtle grading with a skid steer, a french drain across the low side of the yard, or a pair of catch basins along a patio that sluices water toward the house. For homes searching for french drains London Ontario has many providers, but the best results come when the same team or a coordinated partner handles both the foundation and the yard. They will match elevations, protect the discharge lines from soil settlement, and balance aesthetics with function.
If you plan a landscape project after waterproofing, loop your drainage contractor into the design. I have seen too many brand new patios trap water because the paver crew did not know where the sump discharge was or that the foundation was now slightly higher after backfill and compaction. A 15 minute call can save a lot of rework.
Real examples from the field
A 1920s brick in Old East had persistent dampness along the north wall, with seasonal puddles after long rains. The owners had added long downspout extensions and regraded twice. Inside, they had a finished basement they did not want to tear apart. We scoped the outside and found original clay tiles with thick iron ochre deposits. Exterior access was tight, but we staged smaller equipment and hand dug near a shared walkway. The wall was in fair shape, so after cleaning and modest crack repair, we installed a rubberized membrane, dimple board, and new 4 inch perforated pipe with geotextile wrapped stone. We tied the system into a new sump, discharged to a bubbler in the front lawn, and coordinated with a landscaper to restore plantings. The basement has stayed dry through two spring thaws and multiple heavy storms.
A 1980s two story near Masonville had a poured concrete foundation and a finished basement with luxury vinyl plank. Water seeped at the slab edge along half the rear wall during two separate summer storms. The yard sloped to the house from a neighbor’s higher lot. We installed an interior perimeter drain along the affected walls, tied it to an enlarged sump with a battery backup pump, and then built a shallow swale and a short french drain along the rear fence to intercept the neighbor’s runoff. The combination dropped the sump cycling rate and stopped the seepage. The owners kept their finished space intact, with two days of interior work and one day outside.
These jobs underline a broader truth. Water problems respond best to whole site thinking. Weeping tile upgrades fix the backbone. Surface drainage and sump details make the fix last.
Final considerations before you start
Expect surprises. Excavation uncovers what time has hidden, and sometimes that includes an old window well long buried, a rogue conduit, or a crack that only shows once the wall is clean. Build a 10 to 20 percent contingency into your budget. Weather can slow things down. Good contractors will communicate daily and adjust the plan when the unexpected appears.
Keep maintenance in mind. Check your sump pump function before the rainy season and after any major storm. Clean the pit and test the float. Walk the perimeter at least twice a year. Look for settlement along the trench line and top up soil if the grade has flattened. Keep downspouts extended and free of leaves. If you installed backyard drainage, flush cleanouts once a year to keep fines from building up.
Most of all, think of the upgrade not as an expense but as a long term improvement to the structure. A dry basement in London, Ontario pays you back every season. It protects air quality, preserves finishes, and supports future plans for living space. Whether you choose exterior excavation, an interior retrofit, or a combined approach with french drains and yard work, invest in design, materials, and a contractor who treats water as a system. That is how you stop the leaks the right way and keep them from returning.
Ashworth Drainage — Business Info (NAP)
Name: Ashworth DrainageAddress: 514 Hale St, London, ON N5W 1G8
Phone: (519) 660-9375
Website: https://www.ashworthdrainage.ca/
Email: [email protected]
Hours:
Monday: 9:00 AM – 5:00 PM
Tuesday: 9:00 AM – 5:00 PM
Wednesday: 9:00 AM – 5:00 PM
Thursday: 9:00 AM – 5:00 PM
Friday: 9:00 AM – 5:00 PM
Saturday: Closed
Sunday: Closed
Open-location code (Plus Code): XRR3+HV London, Ontario
Map/listing URL: https://maps.app.goo.gl/9kaoXAxRtJRP1ThS9
Embed iframe:
Socials (canonical https URLs):
Facebook: https://www.facebook.com/ashworthdrainage/
X: https://twitter.com/ashworthrules
Instagram: https://www.instagram.com/ashworthdrainage/
https://www.ashworthdrainage.ca/
Ashworth Drainage provides basement waterproofing and foundation repair services in London, Ontario and surrounding areas in Southwestern Ontario.
The company helps homeowners address wet basements, water intrusion, and drainage issues with solutions that fit the property’s conditions.
Service requests can include foundation repair, waterproofing options, sump pump and drainage-related work, and related assessments.
Ashworth Drainage is based at 514 Hale St, London, ON N5W 1G8.
To reach the team, call (519) 660-9375 or email [email protected].
Business hours are Monday to Friday 9:00 AM–5:00 PM, with the office closed Saturday and Sunday.
For directions and listing details, use the map listing: https://maps.app.goo.gl/9kaoXAxRtJRP1ThS9.
Popular Questions About Ashworth Drainage
What does basement waterproofing help prevent?Basement waterproofing is intended to reduce water intrusion and moisture problems that can lead to dampness, leaks, odors, and damage over time.
How do I know if I may need foundation repair?
Common signs can include visible cracks, water seepage, shifting or uneven areas, or recurring moisture problems; an on-site assessment is usually the best way to confirm causes and options.
What areas does Ashworth Drainage serve?
Ashworth Drainage serves London, Ontario and surrounding areas in Southwestern Ontario.
What are Ashworth Drainage’s hours?
Monday–Friday 9:00 AM–5:00 PM; Saturday closed; Sunday closed.
How can I contact Ashworth Drainage?
Phone: +1-519-660-9375
Email: [email protected]
Website: https://www.ashworthdrainage.ca/
Map: https://maps.app.goo.gl/9kaoXAxRtJRP1ThS9
Facebook: https://www.facebook.com/ashworthdrainage/
X: https://twitter.com/ashworthrules
Instagram: https://www.instagram.com/ashworthdrainage/
Landmarks Near London, ON
1) Kiwanis Park2) Western Fair District
3) Covent Garden Market
4) Victoria Park
5) Budweiser Gardens
6) Museum London
7) Fanshawe Conservation Area